Image Map

Holiday Ideas for Kindergarten

Sunday, December 21, 2014

Hello!
I am so excited for Christmas! This is my absolute favorite time of the year, I can't believe Christmas is just a few days away.
We had our Christmas play and holiday song performance in our class last week. The kids did a wonderful job and we were so proud of them! They were absolutely adorable, the parents were very impressed with their talent!

We have been working hard on holiday projects to decorate our classroom.
We made ornaments for the children to give to their parents for Christmas.


They are super easy; a white paint handprint around the ornament and then once they dry, decorate the fingers to look like snowmen. Then, after they were done, I added twine and a ribbon to make it look cute.

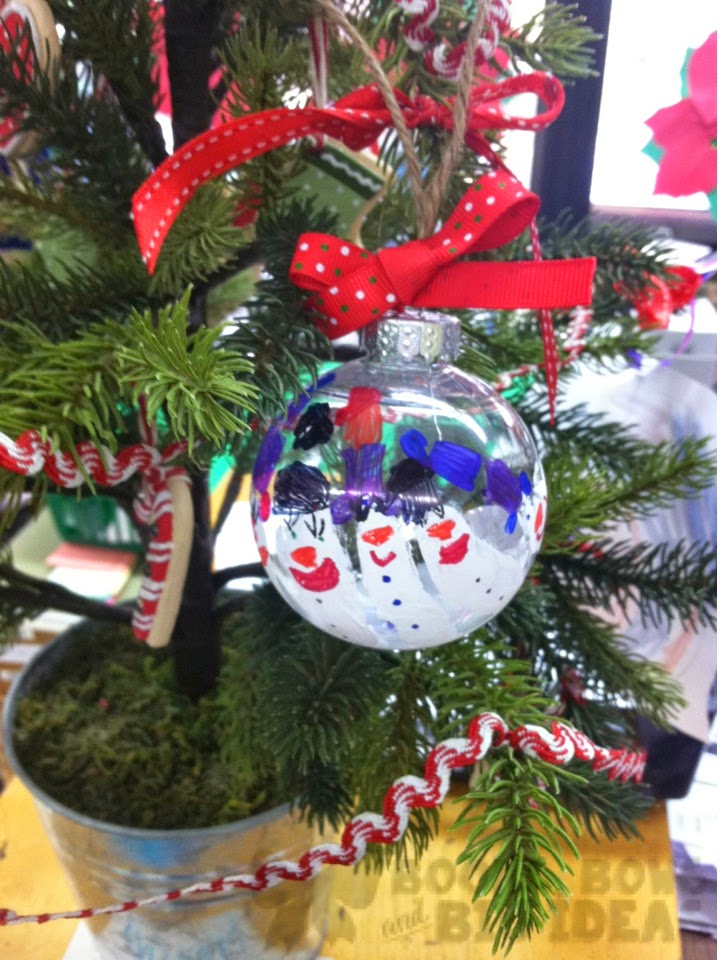
To make it easier, we placed the ornament on a dixie cup as it was drying. We used the cups again as they were decorating to make it easier for them.

I used plastic, shatterproof ornaments from Michaels. I wouldn't try to use glass ornaments at all, so many of them dropped on the floor and bounced around the room as they were decorated. One even got stepped on somehow, I was SO glad I didn't get glass ornaments.

We had them decorate a bag and added this cute poem to "wrap" it. We put it in a piece of tissue paper and put it into the bag.


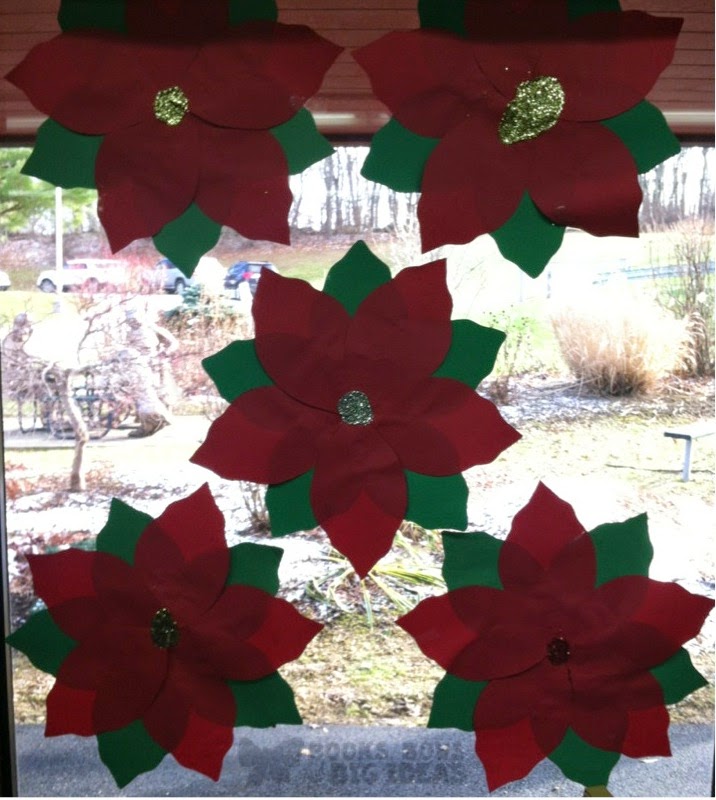
We also made these poinsettia flowers for the windows. We have been doing these for years and they always look so nice.


We made these adorable Christmas light names.


These were Pinterest inspired, I've seen a few different versions of them, but I decided to create my own version. They were very time consuming since I had to work with each child individually, but they came out so cute! We had rows of them hanging on clotheslines from the ceiling.

Then, we made menorahs for Hanukkah.


Every year, we read a variety of gingerbread stories with the kids. Then we have them create a gingerbread for the story that they liked best and we graph them. Here is this year's graph.

Sorry about the bad quality. I didn't realize that it was blurry until after I had gotten home.


We still have school Monday and Tuesday before we are off for winter break, we are one of the only districts around to have school this week.
We will be having a Polar Express pajama day and doing lots of fun activities, the kids are SO excited.

Thanksgiving in Kindergarten

Friday, November 21, 2014

Hi everyone!
Isn't it crazy that it is already almost Thanksgiving?
My absolute favorite time of the year is coming up and I can't wait! (Not that I haven't already started celebrating). I would be lying if I told you I haven't already watched hundreds a few Christmas movies, am about half way done with my shopping, and contemplated decorating the house three or four times. I decided to contain myself, I will decorate on Black Friday and Saturday, after my shopping. We are having Thanksgiving at my house this year, I am a perfectionist when it comes to decorating, especially for holidays, so I have been working hard on my Thanksgiving table (check back for pictures later).

We have been doing quite a few Thanksgiving themed activities in kindergarten lately. I think our kids are getting a little bit sick of turkeys!
We had cute jack-o-lanterns on the windows for Halloween and replaced them with these adorable turkeys! The turkeys are included in my Thanksgiving centers if you are interested in them. Click here to see my centers.


I just had to post a picture of this one, it makes me laugh every time I see it! This little cutie cut all of her feathers out and then we glued them to back so that she wouldn't have to do it over. It looks like the turkey is getting an electric shock!

We also made these cute handprint turkeys.
The poem is not mine. I am not sure who originally created the poem, but it is all over Pinterest and TpT. I just love the way they turned out. The best quote of the whole day was when I was painting a little boy's hand he says, "I've done this before, it was horrifying!". It was so funny! I don't know where he heard that.
The kids wrote their names on the line. I just couldn't include it in the picture. 


Every year we make Native American costumes with the class. This is something that is a lot of fun and looks really cute in the end. The kids each send in a pillowcase and we cut them to make it into a costume. Then, they use Sharpies to draw Native American symbols on them (not sure how accurate the symbols are, but we have a sheet with the symbols that are pretty age appropriate and easy to draw). Usually we made dyed macaroni necklaces, but this year decided not to.


We also made these cute turkey headbands this year. The idea came from Miss Kindergarten. They came out so cute! We will definitely be doing these again!


Do your girls add eyelashes to everything also? Our girls always add eyelashes!
We did all of these things this week so it wouldn't be too much next week. We still have Monday-Wednesday of school next week! We go all the way up to Thanksgiving every year. The good news is that I am done with my college classes until after Thanksgiving, so now I can focus on kindergarten and Thanksgiving!

Have a Happy Thanksgiving!

Pumpkin Day!

Sunday, November 9, 2014

Hello!
I can't believe that it is already November, the year is flying!

One day a few weeks ago was our pumpkin day. This is the first year we have done this and it was really great!
The kids loved it and it was so different and fun.

We got 5 small sugar pumpkins for this lesson, one for each table. It was really great because the kids got to really get involved and it was not like anything that we have done yet this year.

First, we read the book "How Many Seeds in a Pumpkin", it was a great introduction for our exploration of pumpkins and their seeds.


After reading, we explained a little bit about science and making observations. We showed them how to use rulers and told them about all of the different parts of the lesson.

The first steps were to draw the pumpkin and count how many lines were on the pumpkins. Easy.
The next parts were a little more difficult, using rulers was completely new, so this was something that we had to help each kid with.


After that we did a sink and float experiment, the kids LOVED this part. Pumpkins are really cool because they actually float, which is not expected. I had a large tub of water in the back of the room, behind an easel so that it is hidden from the rest of the class. I made a big deal that they had to whisper what happens so it remains a surprise for the rest of the groups. I would take one group at a time to the back and ask each child what their prediction was. Then I would have each child place the pumpkin in the water, it floated every time! They were so excited!


The last part was a lot of fun! We had the kids estimate how many seeds were in their pumpkins (the book was an awesome introduction for this part). Then we cut each pumpkin open, they were able to pull all of the seeds out and count them. Some of the kids loved getting messy and pulling out all of the slimy stuff, and some kids wouldn't even touch it. I was shocked by how many seeds were inside each pumpkin, one of them had 400 seeds! I made pumpkin mats on the computer and had them put ten seeds on each pumpkin, I had 3 mats for each table, thinking this would be enough, I was way off! I ended up having to quickly make some construction paper ones for the rest of the seeds. I was so glad that I made these mats though, it made the counting process so much easier. We are also working on counting by tens so it was great for that too.


It ended up being a really great day, the kids loved it and even though it was a little bit stressful, it was so worth it. We will definitely be doing this again in the future.

Click the pictures below to get a copy of the observation pages, and pumpkin seed counting mats for free.


Graphics by: Kari Bolt, Little Red and KPM Doodles
Enjoy!


Interactive Math Notebook

Saturday, October 18, 2014

Hey everyone!
Happy fall! I am SO excited for the fall. I love everything fall and am loving the cooler weather and pretty leaves.

We have been very busy in kindergarten! One of the things that I have been LOVING is my interactive math notebook. This is our first year using the notebook and I can already see its benefits.

When I first heard about the interactive notebook craze I have to admit that I was a little bit skeptical. I wasn't so sure about the combination of lots of cutting, gluing and then closing a notebook with kindergarteners. Now I can confidently say that I had nothing to worry about!
I decided to make a notebook for kindergarten when I didn't see many available for the younger grades and wanted to try it. We planned on starting this year, I was excited but terrified a little nervous. You forget what the beginning of kindergarten is like when the kids are doing so well in June! The beginning is rough but quickly getting better and better every day.

I bought each child a spiral notebook when they were on sale for 17 cents each at Staples over the summer. I would recommend buying them over the summer when they are cheap.

First we had the kids color the covers, we did these during the first week of school. (I had already cut them out and written their names on them.). Then I painted the covers of the notebooks with Elmer's Glue. I put the covers on and let them dry.
Some of the kids got really creative! (The name is on the line, it has been blurred for safety, but you get the picture!).

The great thing about the math notebooks are that they cover all of the common core standards for kindergarten. There is at least one (usually more) page for each standard. We don't use them to teach the concept, but we use them as a supplement to our math program. It is a great thing for the kids to look back at and review what they already learned.
Right now, we are doing the simple math pages, as the year progresses we will be using the notebooks a lot more and doing more advanced concepts.

When we do a page, I print it on colored paper and then explain it and complete the page in front of the class. The colored paper is SO exciting for the kids, they are always so excited to see which colored page we will do next. Before even handing out the notebooks, I show how the class how to do the page. I cut out all of the pieces in front of them and then glue them into my sample notebook. I leave the sample notebook up so that they can reference it if they need help. As they get more advanced I may take that away so that they can do it themselves, but for now, they need it.
Then, we hand out the notebooks and they get to work. It is quiet when they are working, I was shocked the first time we did a page. This class loves to talk and we couldn't believe how quiet they were! They were really into it! They all did what they needed to do, they understood what to do and they did it correctly the first time.

Here are some samples of what we have done so far.
Sticker Math: Definitely a favorite!
One of the great things about interactive notebooks is that they can easily be differentiated for different children. The student below was finished early so we added another step, while some children will just be able to complete the cutting and pasting.
"How Many Stars?": Some of the kids started to finish up early, so they drew each number of pictures next to the number. 

The first page that we did, they did so well!

"How Many Stars?": Tracing the numbers.
"How Many Stars?": Glueing.
"How Many Stars?": Finished product, great work!
I am SO glad that we started interactive math notebooks this year. I really feel like the interactive aspect of the notebook gives it a more hands on feel. The children really get into the concept and understand it rather than just filling things in on a sheet.

If you are interested the notebook is for sale in my TpT shop, just click the product cover below. I have heard from other teachers as well that they are loving it in their classes.


Do you use interactive math notebooks in your class?

Back to School Classroom Ideas

Monday, September 1, 2014

One of the things that I LOVE to do every summer is get the classroom ready for the incoming kindergarteners. It is so much fun to think of fun, new bulletin board ideas and other classroom decorations. We try not to do the same things twice on the door (sometimes we do, but not two consecutive years) and it is always a long process to try and decide what we will do this year.

After moving to a new school last year, we now have a big bulletin board outside the classroom as well as these metal work holders (I have no idea what they are called). We also have to decorate the door and other spaces inside the classroom.

This year our door theme was ladybugs, it says "Look Who's Been Spotted in Kindergarten!". I just love the way it turned out! It is so fun and cute. Next time, I would make the pennants smaller and the kindergarten letters smaller so they are not so curved. I made a ladybug for each kid with their name on it and it looks really cute!


The big bulletin board has a Pete the Cat theme. We do a fun little Pete the Cat activity on the first day of school and all of the kids love it! I decided that a Pete the Cat bulletin board was perfect for the beginning of the school year. This idea was inspired by this pin. I made the cat out of big blue bulletin board paper and then typed and printed the letters. I am SO happy with the way it turned out!


The next thing is my favorite new thing that we did this year. We put these signs outside the classroom, in the spot that we hang up student work throughout the year, for kindergarten orientation. I think that it really adds something nice and special for each child to be able to find theirs and get excited about their kindergarten year. I like that it is personal to each student as well.


I made a boy and girl sign, I think they came out really cute!


We go back to school this week in NY, I am excited for the new school year and for autumn weather, it is so hot out, not the best weather for school!

What did you do for your bulletin boards and classroom door this year? I would love to see! Leave a comment with your blog post/pin or tell me about it in the comments!

Organization For Back To School

Saturday, August 23, 2014

Hi Everyone!
It is crazy to think that summer is winding down and in a few short weeks school will be starting up again! I am sad to see the summer go but also excited for the new year.

One of the things that I love is organizing. I know that during the school year, it can be difficult to stay organized, so I am going to share some of my best organizational tips with all of you today!


I am the kind of person that never goes to sleep without picking out my clothes for the next day. I always check the weather at night and then pick out my clothes. This year, I am going to try something a little different. I am going to pick out all of my clothes for the week on Sunday night. On Saturdays, Sundays and days off, I don't really lay my clothes out unless I have somewhere to go early in the morning. I am going to use these hanger signs to make special hangers to hang my clothes for the week. I think that this saves so much time in the morning, and even if it gives me an extra five minutes to sleep I am happy. I always see a difference in the "morning rush" when I don't lay out my clothes the night before.
These special days of the week hangers make it easy to lay out your clothes for the week. I use the Real Simple slimline hangers from Bed, Bath and Beyond in my closet. I just cut and laminated the hanger signs and added a cute ribbon.
This was my Monday outfit for the week, I hang the entire outfit on the hanger and put them all in a separate spot in my closet. 

You can get these hanger signs for free by downloading the freebie at the bottom of this post.


Another thing that is really great to help you stay organized is a meal planner. You can choose to use it for packing lunches, making dinner or both. There is a spot so that you can write all of your meals for the week and another spot where you can write a shopping list so you can get everything you need to make these meals. This way you know what you are making and you are sure that you have all of the ingredients before the week even starts. I like to use a picture frame for the meal planner because I can use it week after week with a dry erase marker and it looks really nice in the kitchen. Of course, you can also print out a new copy every week and use it like that. The frame I used was 8x10 inches, so I changed the scale to 95% when I printed the meal planner.
Here is an example of how the meal planner can be used in a frame.

You can get a copy of the meal planner for free by downloading the freebie at the bottom of this post.

The last thing is something that is really important for me, personally, to stay organized. I use a planner every day. I have an Erin Condren planner that I love, but I also use these weekly planning pages. I write down EVERYTHING that I have to do that day from laundry to math homework due to go to the gym. I cross things out once they are done and then once everything is done for the day, I put a big X through the box so that I know I accomplished all of the things that I wanted to for the day. I try to finish everything each day but some days it is just not possible so I add it to the list for the next day. You could also use the picture frame for this, I just prefer not to.

You can get a copy of the weekly planner for free by downloading the freebie at the bottom of this post.

Click the picture below to get a copy of the hanger signs, meal planner and weekly planner for free!